Hello out there!
So life has been a little on the hectic/crazy side, with the holiday, and getting back to work, and getting ready for summer (yay!)
So I figured I'd take the time to answer some frequent questions I get.
Q: What kinds of baby food have you made?
A: All kinds! So far, I've done the following,(in order)
Avocados
Sweet Potatoes
Bananas
Apples
Squash
Pears
Peaches
Peas
Mango
Blueberry Pear
Ground Brown Rice
Q: How do you know what is good for the baby?
A: I read a lot! But I also realized I could just go to the baby food shelf of my local grocery store, and see what they have there! It's getting interesting now that baby is turning 6 months - All kinds of great combinations I can start playing with!
Q: Where do you find the time to make baby food??
A: It really doesn't take very long, usually a couple minutes to get the fruit/veggie on the steamer (if needed). Then maybe 10 minutes to puree, strain and pour the mixture into the freezer trays. The time in between when the food is steaming to when I can puree, I do the dishes, or make our meal, or feed baby.
Q: Where do you find the energy to do all this?
A: My husband Andy takes Avery over to a friend's house on Wednesdays, and sometimes on Saturday afternoons, so I have some time to focus on getting a sewing project done. The baby food, per the previous question just gets made on the fly, when I have a couple minutes.
Q: Why do you make your own baby food?
A: I like knowing what's going in Avery's mouth. I hate how many preservatives are in baby food, and the older she gets the scarier it gets (what exactly is in a "Chicken Dinner and vegetables?" (yikes). So I did some research, and found some recipes, and instructions on how to prepare baby food. An added bonus is that we are seeing some cost savings too by preparing her food at home and freezing it.
Q: How much money are you really saving?
A: Well, it depends. I think the best example so far is with the Mango I made. The cheapest I've found "NameBrand" Mango is $0.98 for 2 small containers of mango which holds approx 4 feedings total. I found Mango on sale for $1/lb at City Fresh Market. I bought a mango for $1.19. After making the mango (and I did not have to add water for it to puree - it has enough juices to do that on it's own) I ended up with 8 serving. So, what is that ? just under 80% savings? Not bad.
Another example - Pears. Now here once again "NameBrand" Pears $0.98 for 2 containers or approximately 4 feedings. I bought 1 can of pears on sale for $1.00. One can gave me about 7 servings, PLUS I saved and strained the juice to serve later as 1/2 juice and 1/2 water. Each can has about 1 cup (8oz) of juice. And each "NameBrand" concentrated juice comes in 4, 4 oz bottles for $3.59.
SO, if I dedicate $0.50 or $0.25 to the juice, and take 1/2 of of a "NameBrand" Juice pack - $1.79, or $0.89 a serving. So, I get about 70% savings.
And for the Pear baby food, I'm getting $0.14 per serving as opposed to $0.49 a serving. Not Bad. Especially since she's eating 4-5 times a day!
I hope this answers some of your questions! And keep them coming! :-)
Wednesday, May 30, 2012
Tuesday, May 22, 2012
Cooking: Roasted Eggplant 2 Ways
 Okay, so admittedly, I've never been a fan of eggplant, but there is a program in my neighborhood that gives out fresh produce, and I found myself with 2 of these things.
So, I figured I'll give it a shot. I googled some 5-star recipes and decided to keep it simple for this first shot.

First, peel the eggplant, I just used a veggie peeler, and tried to keep the skin pieces pretty big.

Next slice the eggplant in about 1/4 inch pieces.

Generously salt both sides of the eggplant slices. Then set them in a collandar (or something like it) because the salt will pull out moisture from the eggplant. (which in turn makes them less spongy after cooked)
Wait 1 hour.
(I used the time to fry the eggplant skins, (see below) do some dishes, steamed some carrots for baby food, swept the floor, cleaned the counters, when I was done, it was about time to get back to it!)

To fry the skins, heat up some oil in a pan. I like to use this old cast iron skillet because, well, sometimes I burn things, and its easier to clean this pan than the other ones if I burn something! :-)

You'll know the oil is hot and ready when you sprinkle just a little water in the oil and it makes a "popping" sound.
Toss, okay, well, gently place the skins in the oil. Let them sit for maybe 20-30 seconds, then turn over with tongs. Take them out and place on paper towels to soak up the extra oil.

Now you have crispy eggplant chips. You can lightly salt them if you want, or just eat them as is!
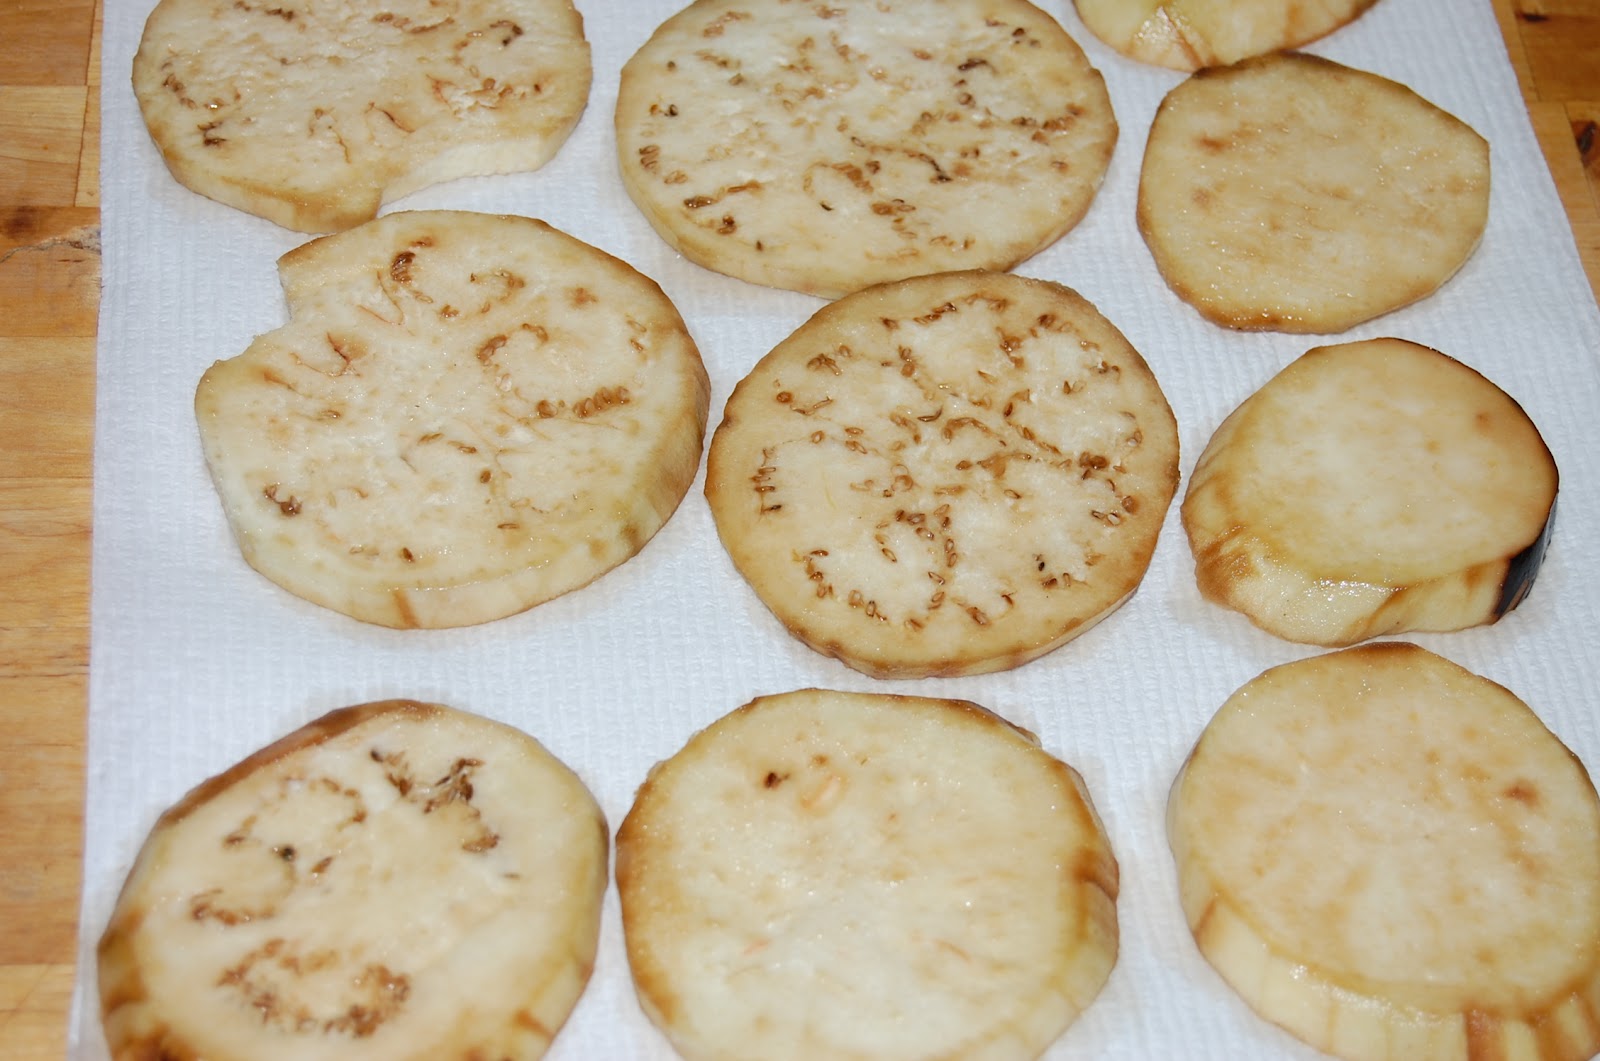
Okay, now back to the meaty eggplant slices, take them out of the collander, and place them on paper towels. Lightly press down on them so as to get as much moisture out of them with out smushing them.

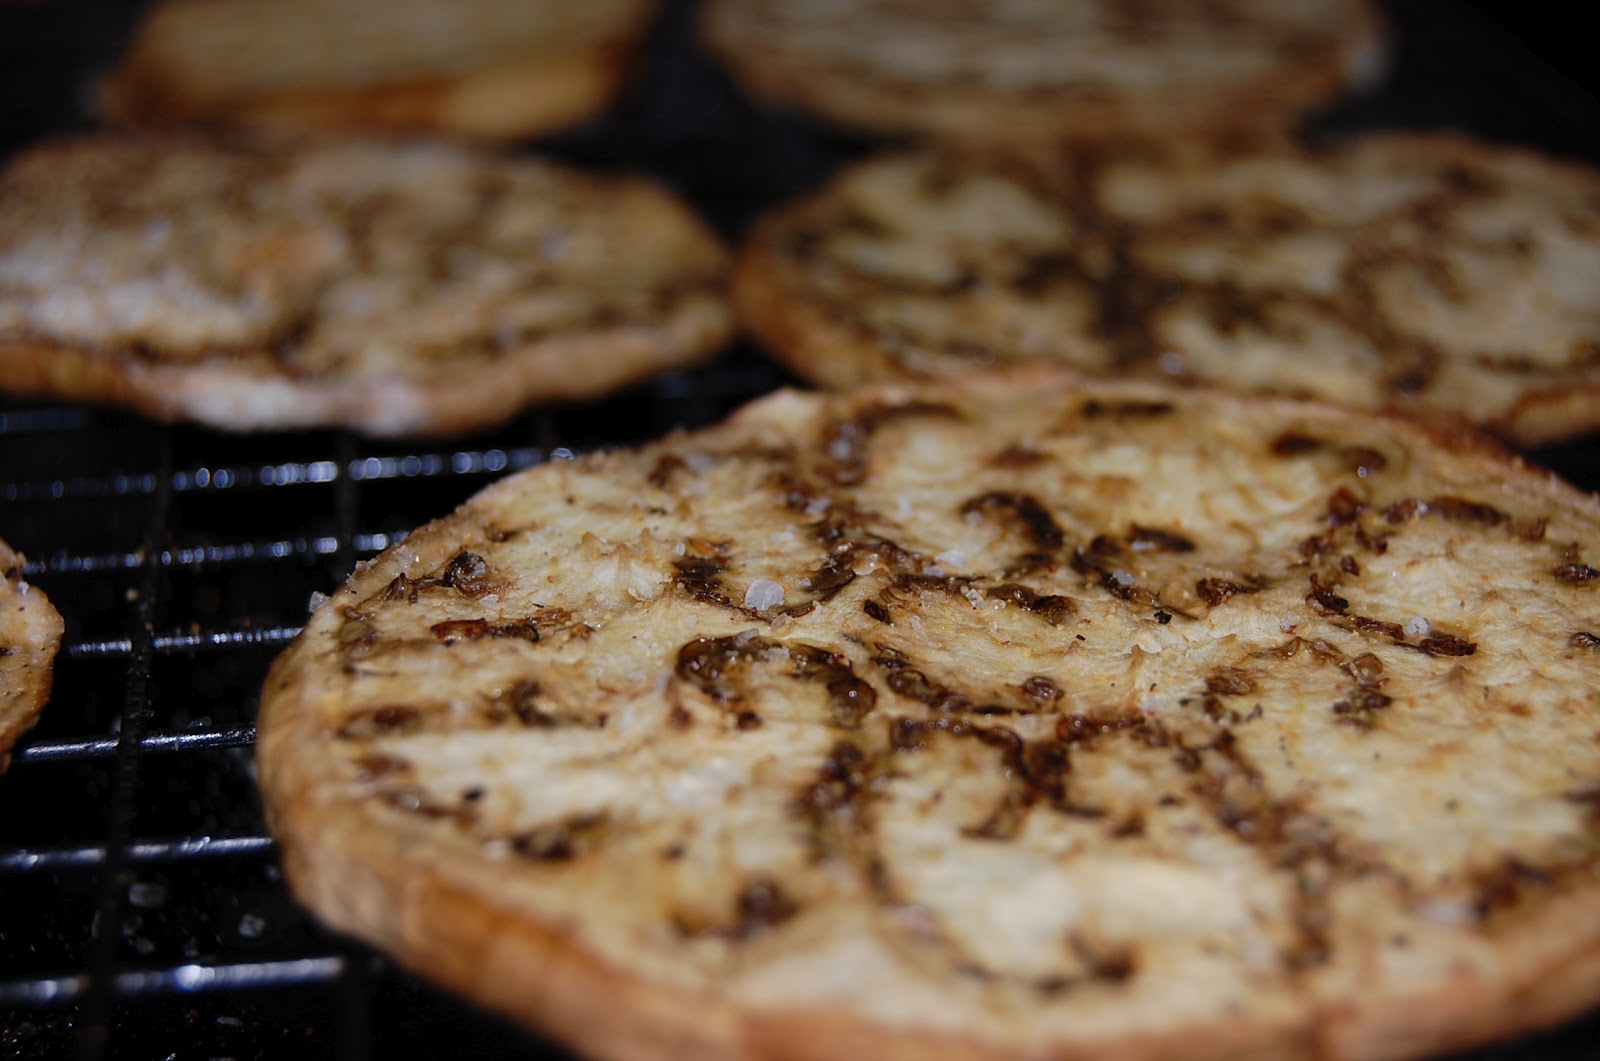
Salt, pepper, and sprinkle with garlic, place on a lightly greased pan, and bake in the oven. I think I did 350 for 20-30 minutes. (my oven runs hot, so you'll want to keep an eye on yours)
And now you have roasted eggplant, and crispy eggplant chips! Enjoy!
Wednesday, May 16, 2012
Cooking: Canned Fruit to Baby Food
Okay, So since I started making baby food, I've gotten a lot of
questions about it. Doesn't it take a lot of time? Isn't it expensive?
Doesn't it take a lot of equipment? So I decided to do a little tutorial
about how I turned this canned fruit ($1 on sale) into baby food.
 First start with fruit in 100% juice. Not the heavy syrup.
  I drained off
the juice and saved it to freeze so next month, I can start giving
Avery diluted fruit juice. (Must be the Dutch in me trying to use/save
everything I can :-)
I drained off
the juice and saved it to freeze so next month, I can start giving
Avery diluted fruit juice. (Must be the Dutch in me trying to use/save
everything I can :-) 
Then throw it in the blender. As for time, I did this while I was preparing spaghetti and held back a couple pear halves for my Husband and me. So as far as how long it takes to prepare, so far, no time at all.

Then puree! You can use a high-speed blender like mine, or you can use a food processor, or one of those special baby food makers, but whatever you have on hand would work.

Make sure it's a nice and smooth consistancy.

Portion out the pureed pears into your freezer trays or ice trays. You could also put these in sterallized glass jars.

As always - Fruit must pass the "Meeko Test." Our silly cat loves fruit!
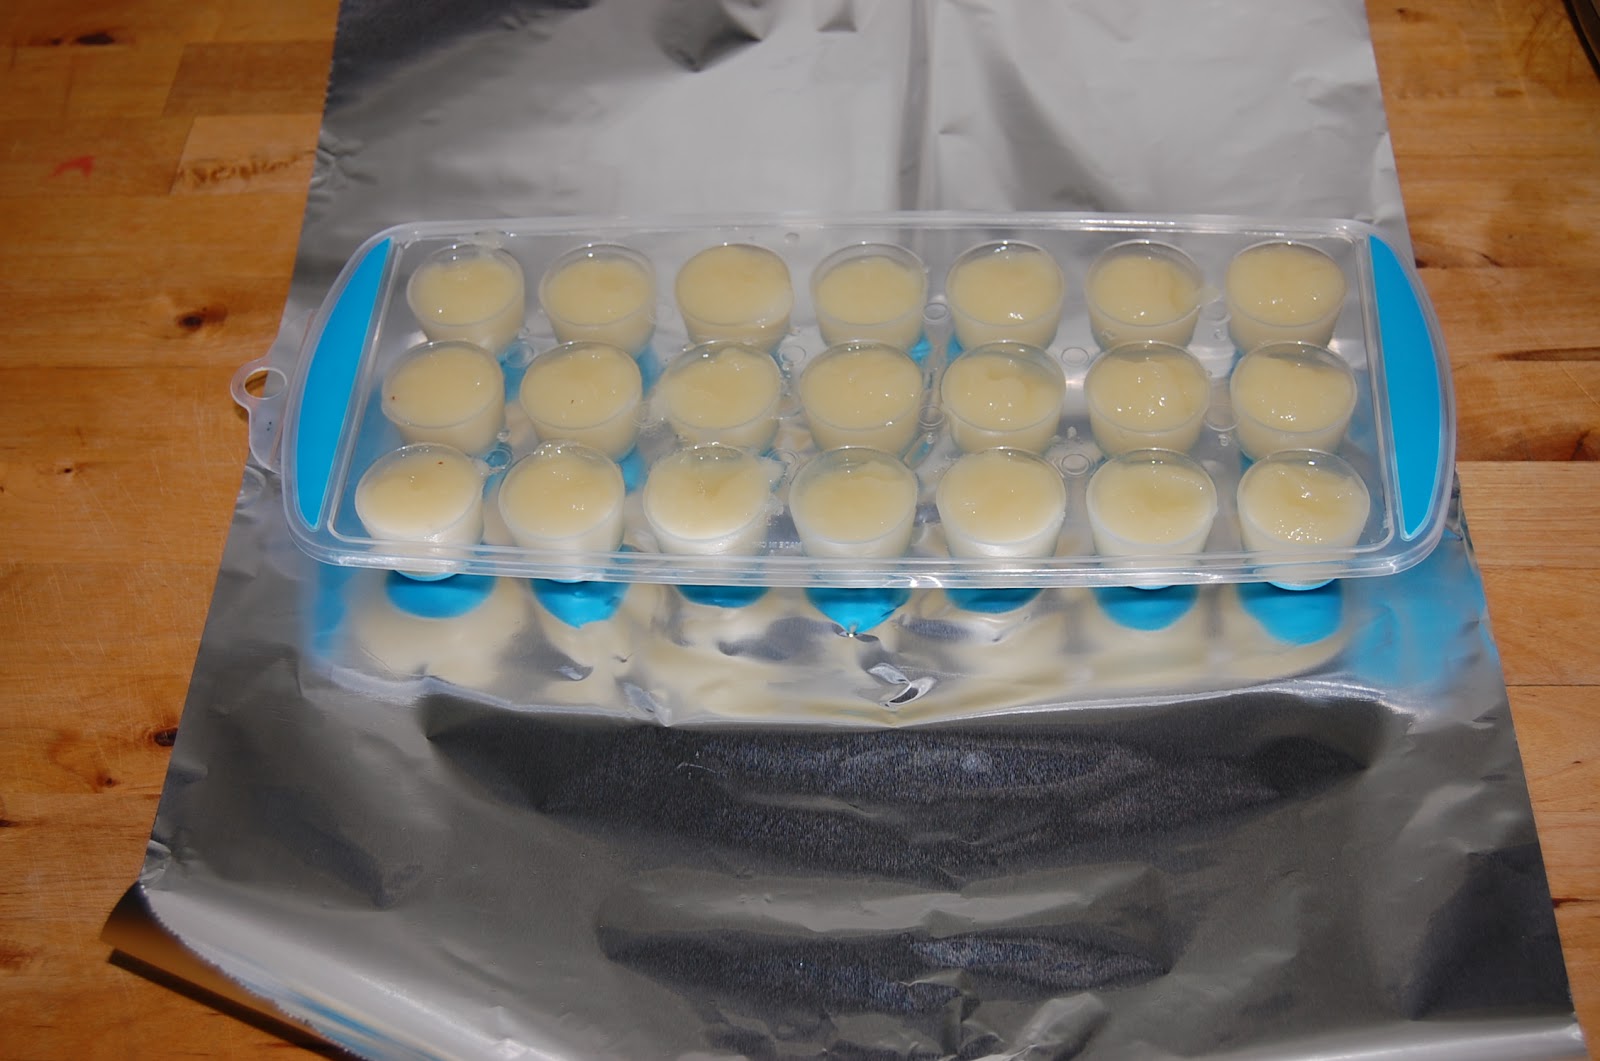
Wrap it up in tinfoil.

Throw it in the freezer, and a few hours later, you've got frozen baby food. Make sure to suck out the extra air, label the date and what it is on the outside, and store away! They should be good for about 2 months in the freezer. Avery is now taking about 3 of these each feeding, so we'll be thru these in no time!

Wednesday, May 9, 2012
Crafting: Stringing Pearls
So, a little off the beaten path, but I saw these beads at Michael's for $0.99 each! I started seeing portraits of Avery with little beads, and big beads, and oh- my! Little strings of glass pearls for playing dress up! Too cute! So I did some research to see how I would go about stringing a necklace of pearl (glass) beads. In this tutorial I used beading thread, but I've also used silk thread from the sewing department as well, and to be honest, I really liked using the silk better, just sayin'. :-)
What you need:
Beads - each of these strings is 12 inches, so the necklace will end up being about 24"
Some form of closure - this is going to really be whatever you prefer
Flexible beading needles - I usually end up using a couple thru this process
Thread - As I mentioned, I actually prefer to use the silk as opposed to what is pictured.
Scissors - whatever is handy

Step One - find a surface that will not allow the beads to roll all over - I used a piece of felt. Then cut a length of thread that's at least 4 times the length of your finished necklace, so 4 times the 24" for my necklace below.


Step Two - thread your needle - you'll want to leave a pretty long tail on it, because the eye collapses once you pull on it a little.

Step Three - Release the Beads! No seriously, be careful when you make the cut that the beads don't shoot off the end.

Step Four, Now, start threading the beads on your thread. Leave a good 8 inches or so open on the end of your thread.

Step Five, thread on 1/2 of your closure.

Step Six - loop the thread back thru the last bead.

Step Seven - make a knot.

Step Eight - tighten the knot down as tight as you can.
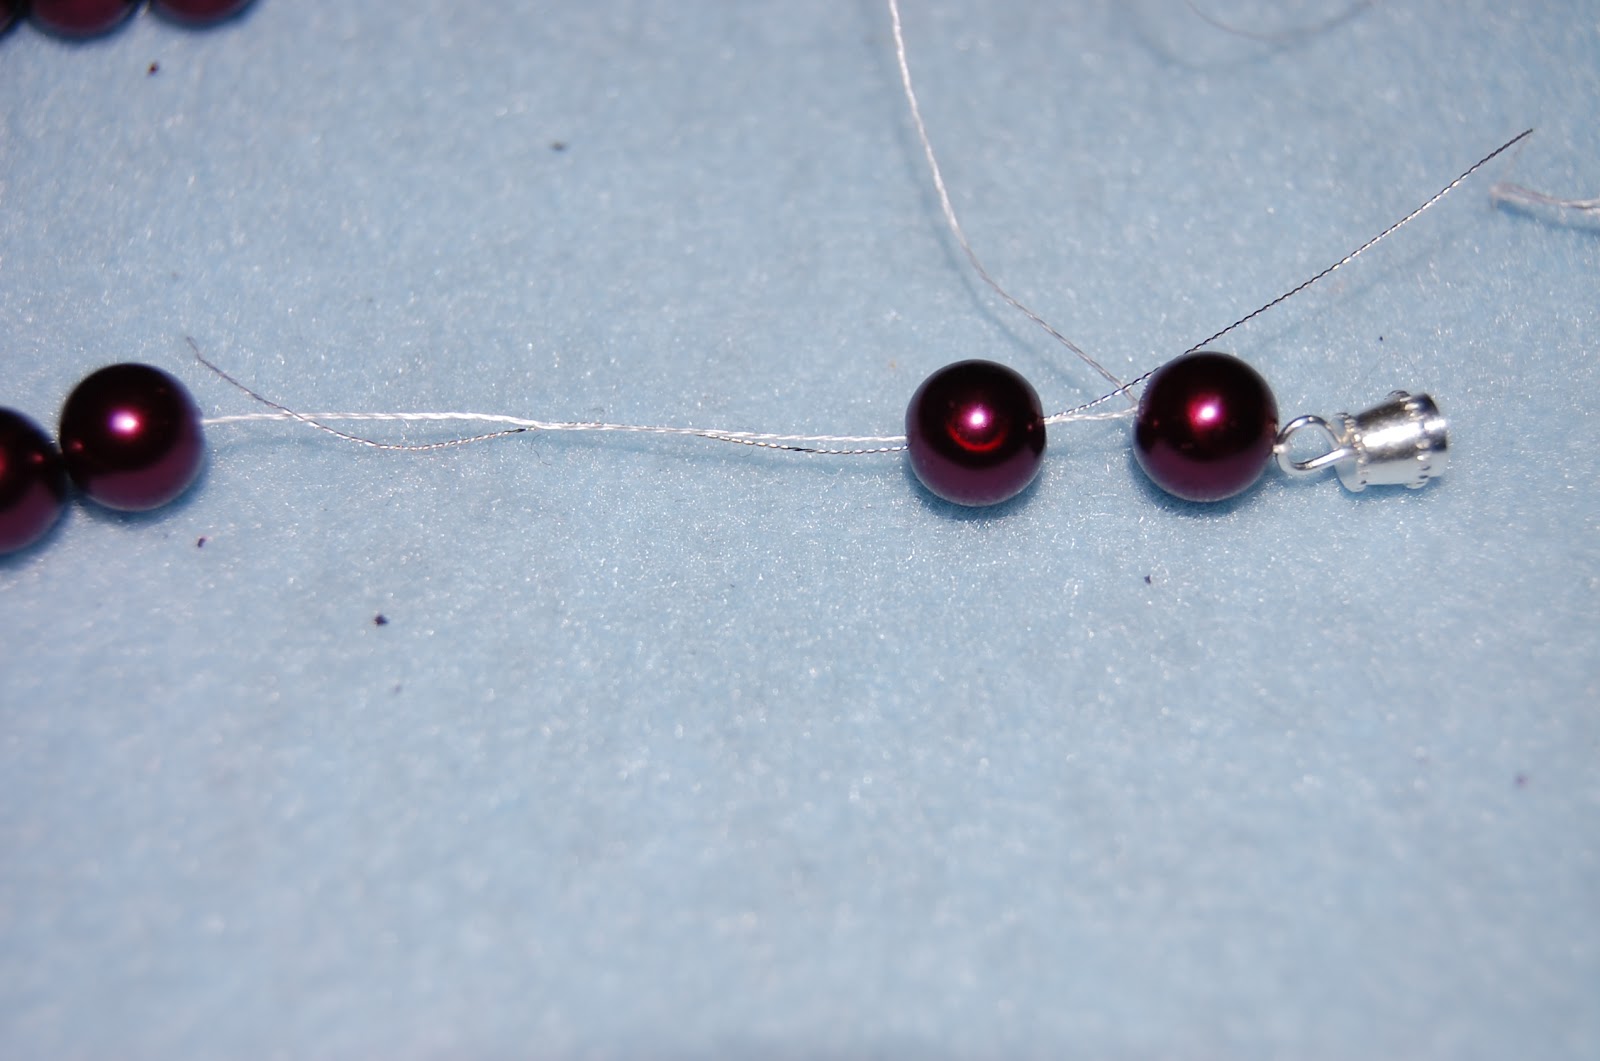
Step Nine - Thread the needle thru the next bead and tie another knot. Repeat, repeat, repeat, repeat ( you get the picture)

Step Ten - Thread on the second half of your closure.

Step Eleven - Thread both of the thread tails back thru the first bead.

Step Twelve - Make a knot. Do this again at least 3 times.

Last Step - Cut the thread! You're all done!


Monday, May 7, 2012
Sewing: Kitty Pocket Pillow
Have you signed up to Follow Me by Email yet? Why not? You can do it right over here --------------->

This cute little guy is a little wacky, a little fluffy and has a great little pink pocket on his back for a little girl stash!
To be fair, I did use a kit for this one. But I made some major changes to make it a little more of what I was thinking.
I chose to stuff the head, legs and tail. The directions were to use flat batting and have open ends with pinking shears. I'm not a fan of that look, so I chose to stuff them.

I also used different decorative stitches all down the tail and on the face. The original kit called for whiskers, but I didn't like the idea, because my own cats would probably try to eat the yarn off his face! So instead, I ended up with what my mom called "Picasso Kitty"
Wednesday, May 2, 2012
Sewing: Suffed Animal Homes
Have you signed up to Follow Me by Email? You Should!! --------------------------------------------->
Sorry for the delay in posts, I'm come down with whatever bug is around and I've not gotten much done in the last week :-( but hopefully I'm over the hump now.
So Avery already has WAY too many stuffed animals, and no where to put them! We were storing them in her crib, but as we move her into her crib, her Fuzzy Friends need a new home. I had the idea to make a little sack to tie to the outside of her crib to hold all her friends, and thus, these were created.


Anyhoo - they are up now and doing a great job!
BTW - the Pink Elephant was one I made for her and the Brown Teddy Bear I've had since I was a little girl! He's wearing my Hantesa Vagabond necktie !

Sorry for the delay in posts, I'm come down with whatever bug is around and I've not gotten much done in the last week :-( but hopefully I'm over the hump now.
So Avery already has WAY too many stuffed animals, and no where to put them! We were storing them in her crib, but as we move her into her crib, her Fuzzy Friends need a new home. I had the idea to make a little sack to tie to the outside of her crib to hold all her friends, and thus, these were created.

It was a quick and easy project, and an added bonus is that they will match her bedding! There is also a nod to her Daddy, with the appliques of "All The Things" and the second one for the other side will read "& More Things"

And here is the bag with a couple embelishments. I'm thinking of doing something more permanant, like some rhinestones, or maybe just some rick-rack.
Anyhoo - they are up now and doing a great job!
BTW - the Pink Elephant was one I made for her and the Brown Teddy Bear I've had since I was a little girl! He's wearing my Hantesa Vagabond necktie !

Subscribe to:
Posts (Atom)